
Testing with Xcode
XCTest, developed by Apple, is the go-to framework for writing unit and UI tests across iOS, macOS, watchOS, and tvOS applications. Integrated into Xcode, Apple's IDE, it makes setting up and running tests straightforward. With XCTest, you can easily create, execute, and manage test cases to ensure your software is reliable and works as expected.
At Hotovo, we've chosen this framework for our mobile projects because it lets us streamline our automated tests. By using native Swift code, we can create behavioral test cases that perform seamlessly on both Xcode simulators and real iOS devices.
Testing is a crucial part of the development process, helping to detect bugs in your code. Here's a summary of how to approach planning an automation test suite for any project:
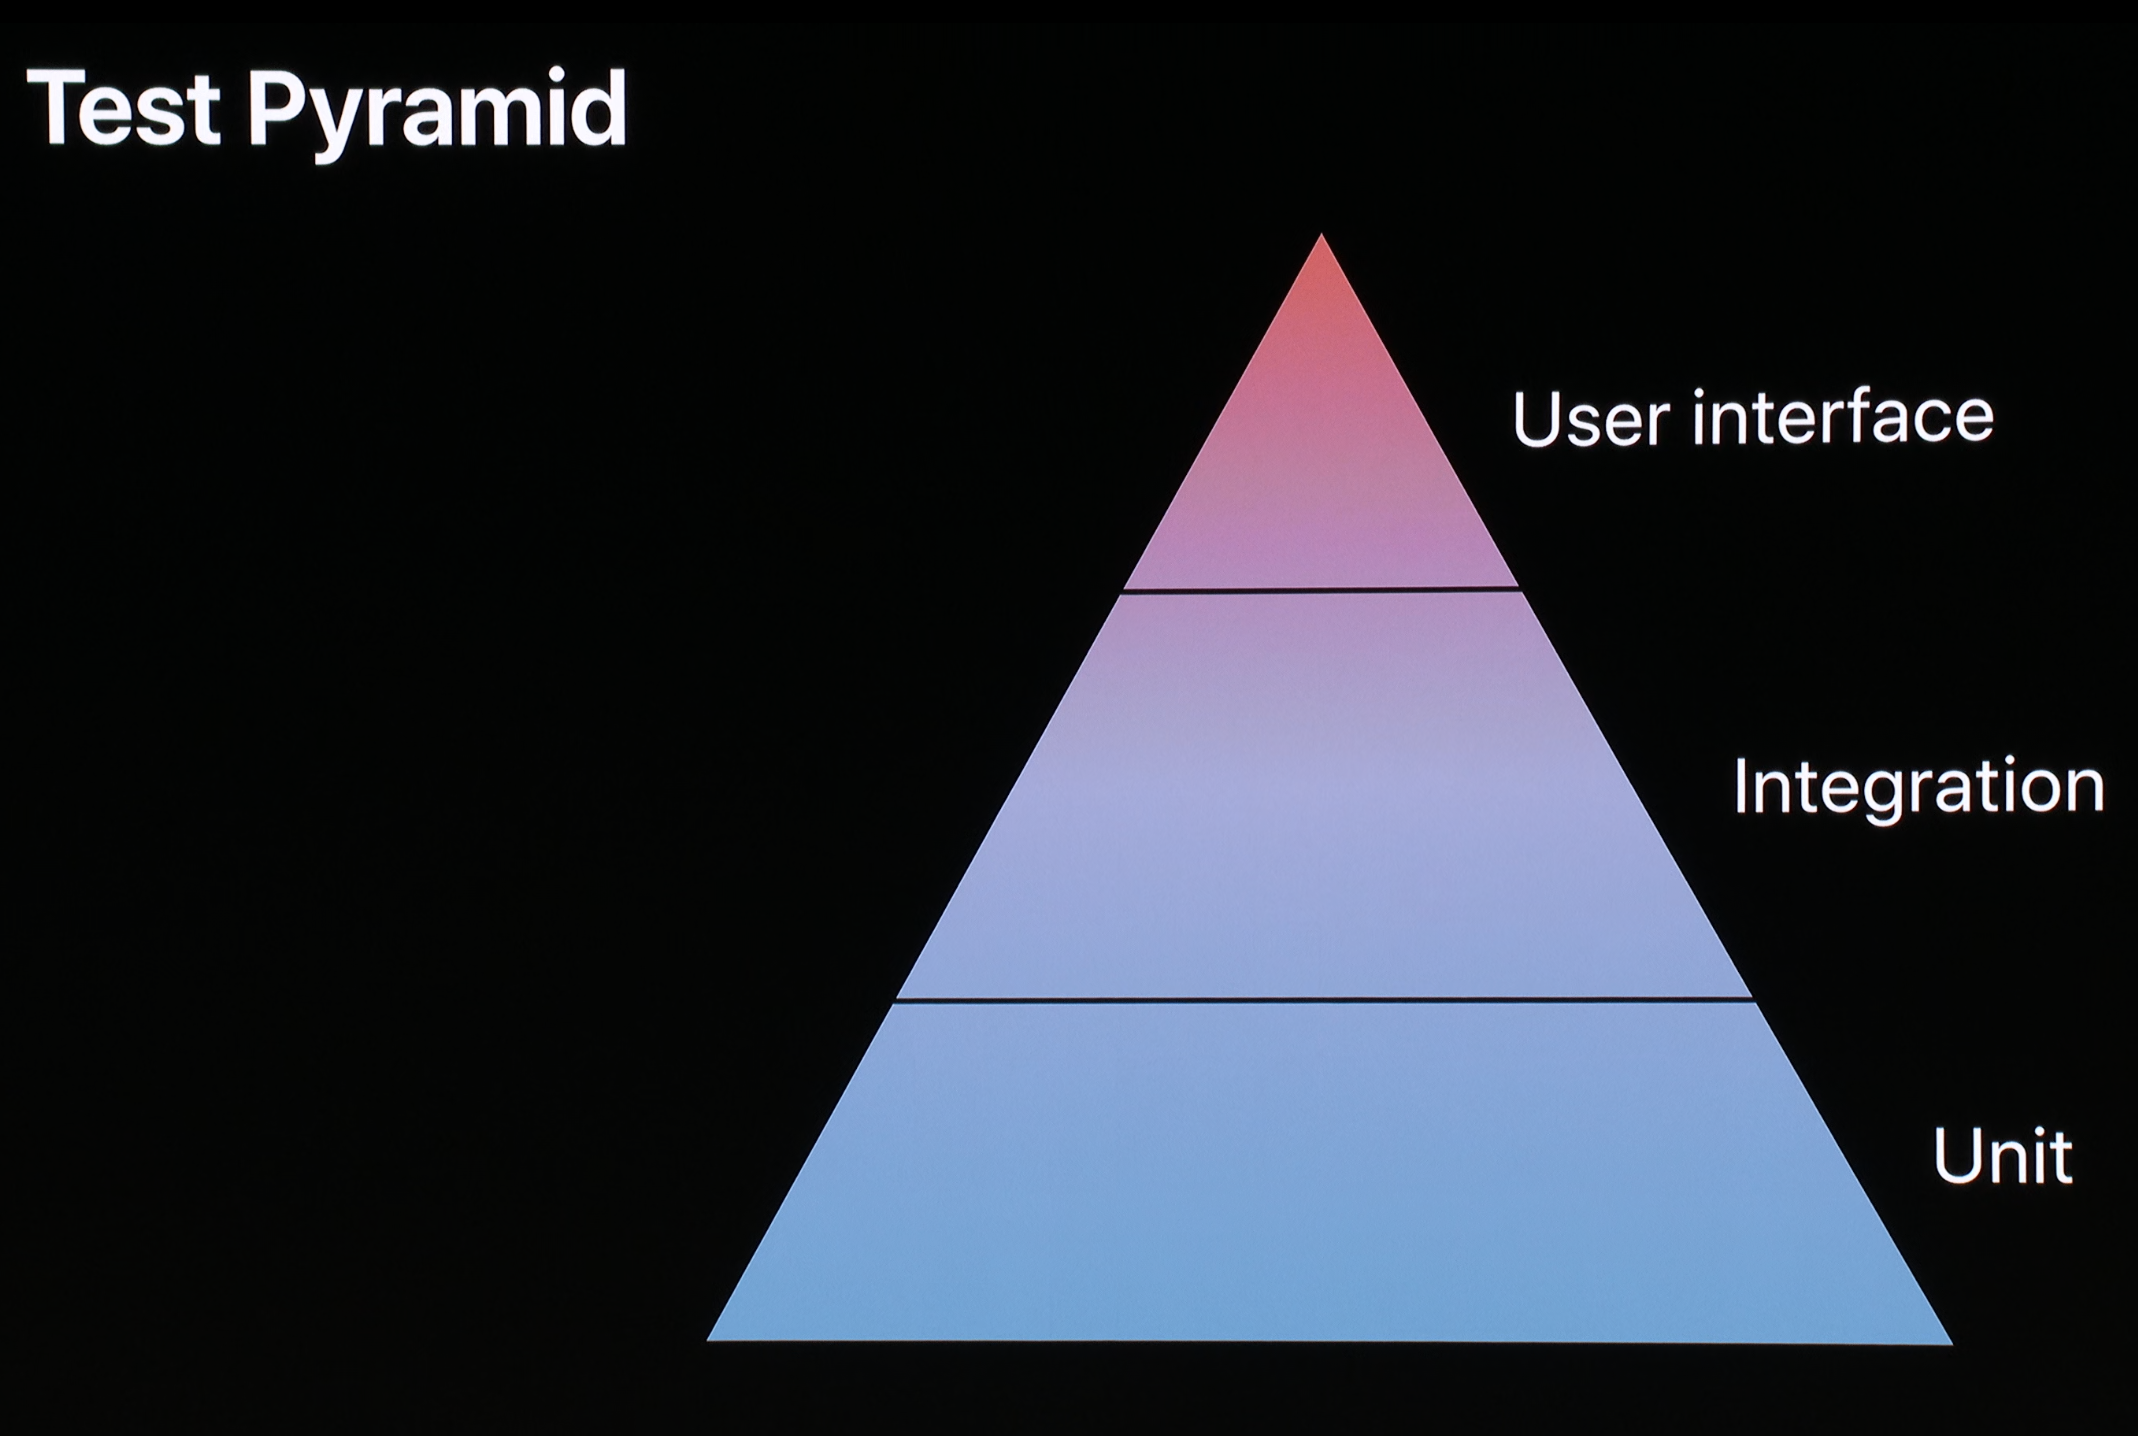
The pyramid model approach to testing strikes a balance between thoroughness, quality, and execution speed.
Key Features of XCTest
1. Unit testing
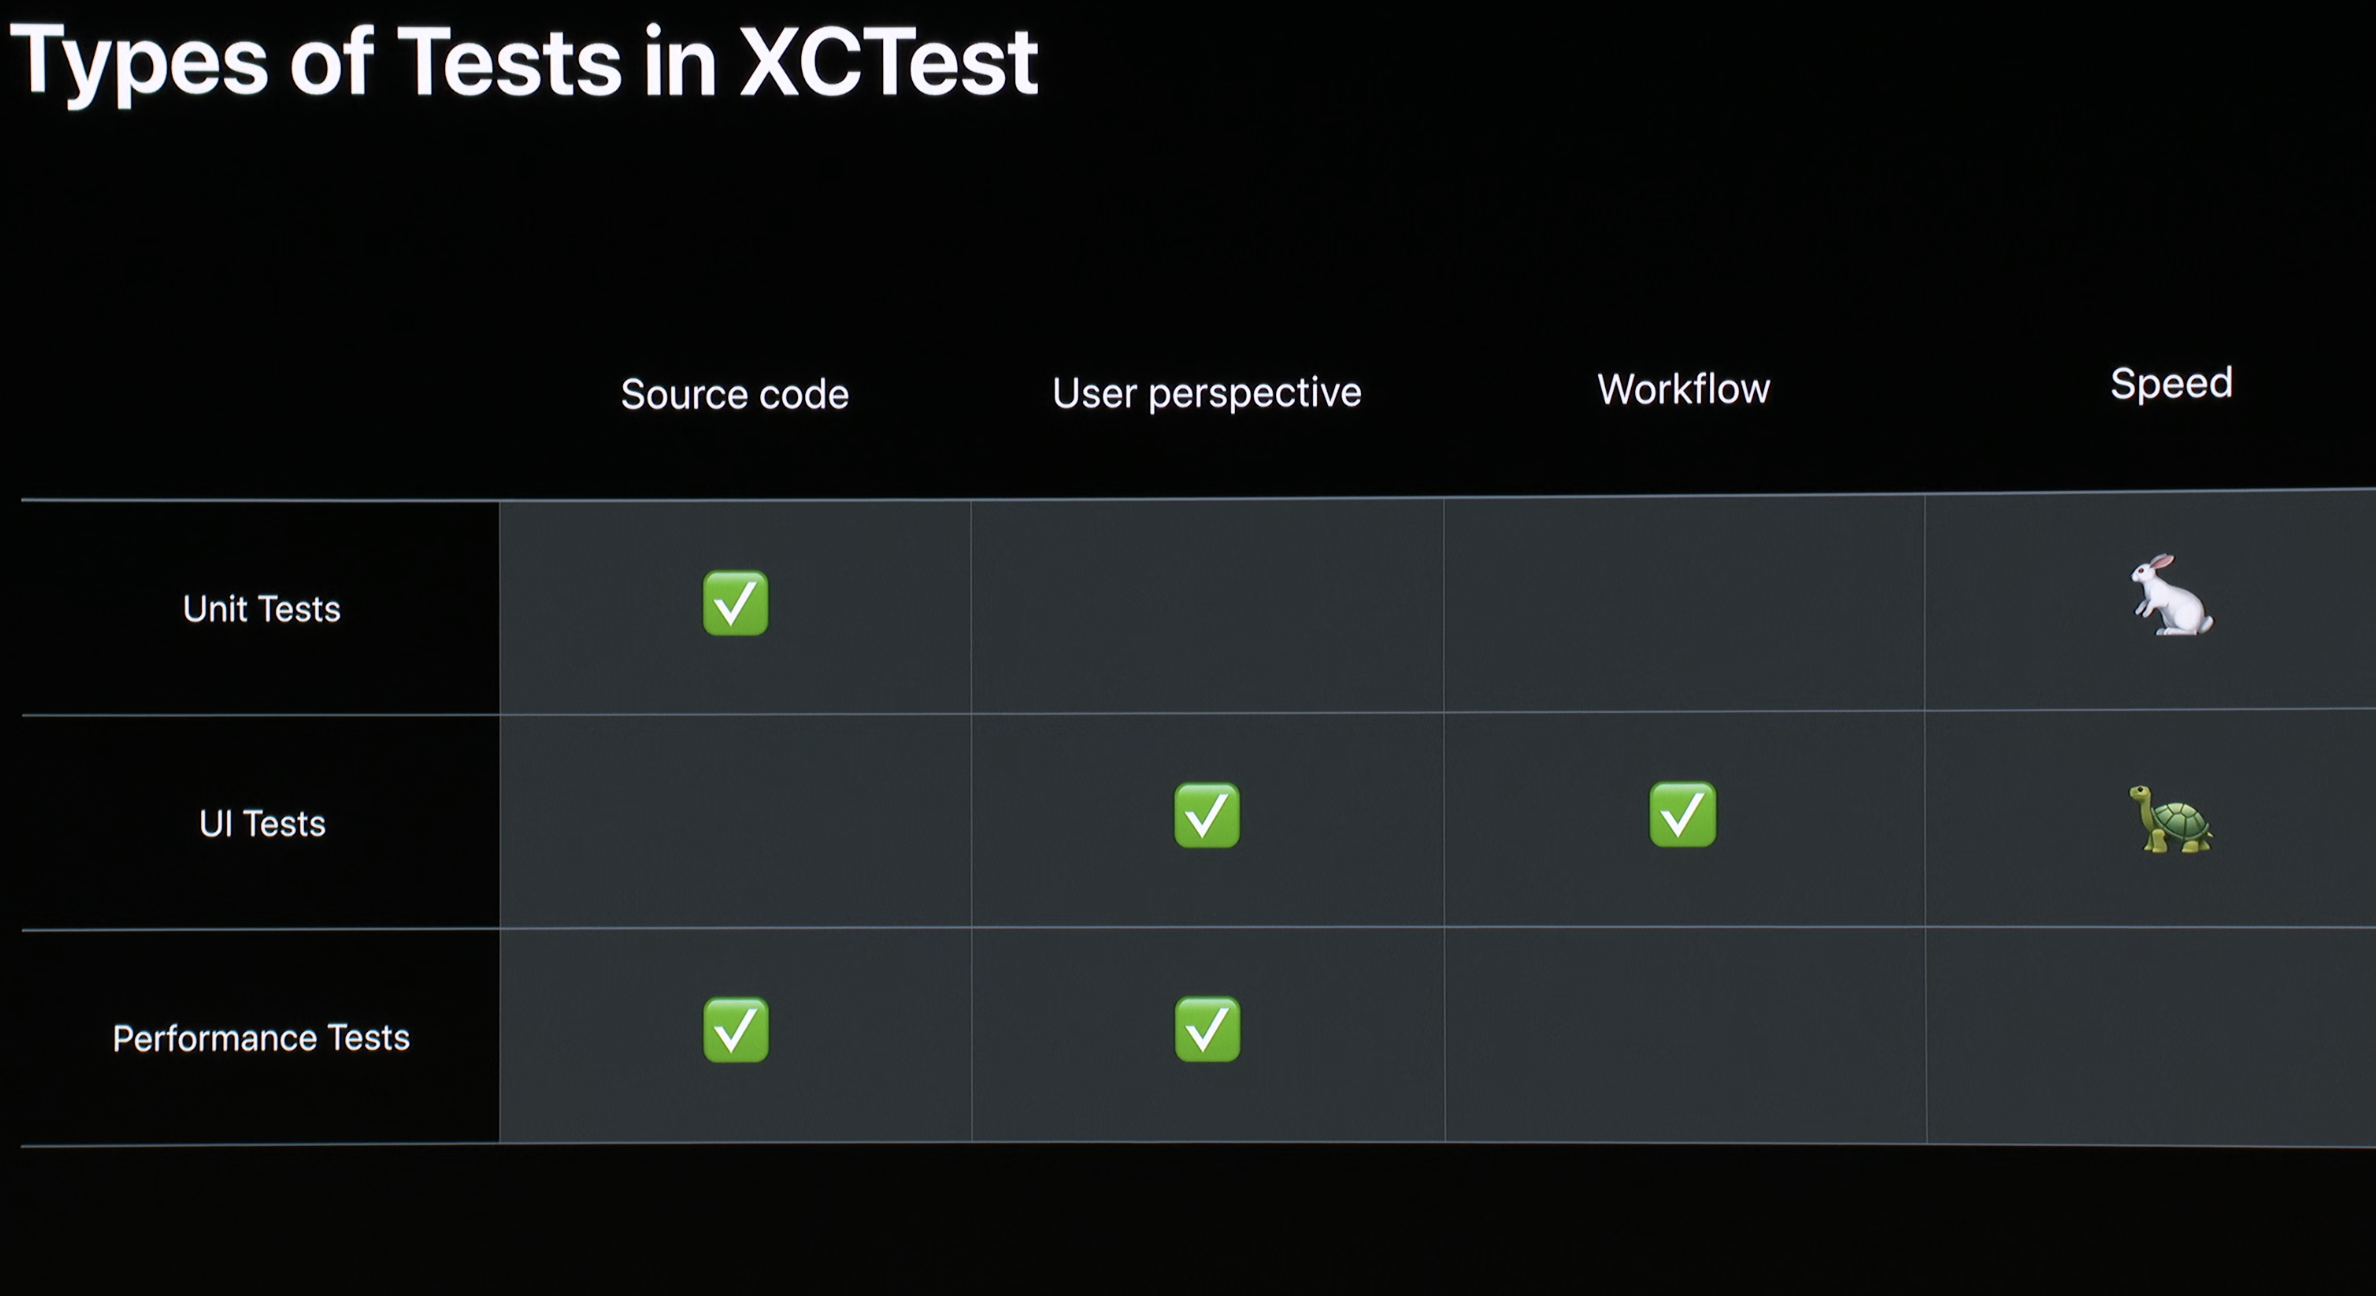
Unit tests are the base of our pyramid. They verify individual pieces of code, typically functions, by checking if they return the expected output when given certain inputs. These tests are quick, simple, and efficient.
- XCTestCase: This is the base class for defining test cases. Each test case includes methods that test specific functionality within your code.
- Assertions: XCTest provides various assertion methods (like `XCTAssertTrue`, ‘XCTAssertEqual’, etc.) to ensure the code produces the expected results.
- Test Suites: Tests can be grouped into suites, making it easier to manage and run related tests together.
- Performance Testing: XCTest includes methods to measure the performance of code blocks, helping identify performance bottlenecks.
2. Integration with Xcode
These tests focus on discrete subsystems or clusters of classes to ensure different components work correctly together. Integration tests build on unit tests, as individual functions must behave correctly before testing larger code sections. Generally, fewer integration tests are needed compared to unit tests.
- Test Navigator: Xcode's Test Navigator provides a convenient interface for managing and running tests.
- Continuous Integration: XCTest integrates seamlessly with Xcode Server and other CI/CD systems for automated testing.
3. UI Testing
UI tests execute on top of your app's UI to provide end-to-end qualification of your app. These black-box tests don't rely on knowledge of the functions or classes, ensuring everything works correctly from the user's perspective.
- XCTest: Provides support for automated UI testing where you can simulate user interactions with the app's UI elements.
- UI Recording: Xcode’s UI test recorder can generate code for UI interactions, simplifying the process of creating UI tests.
- UI Interactions: The framework supports detailed interactions with UI elements, such as taps, swipes, and entering text.
4. Custom Test Reporting
After a test run, Xcode displays a status icon in the Test navigator next to the test plan and each item in its outline view.
- Detailed reports: XCTest can generate detailed test reports, which can be customized and exported for analysis. The reports can include the number of tests run, tests that passed or failed, and detailed error messages for failures.
- Possible states: Test outcomes can include “The test passed.”, “The test failed“. The failure may also be due to a test that should have failed but didn’t., “The test failed with some expected failures, but there were no unexpected failures.”, “Xcode skipped a test.”, etc.
Basic Structure of an XCTest
An XCTest unit test case typically looks like this:
swift
Copied!
import XCTest
@testable import MyApp

class MyAppTests: XCTestCase {

    override func setUp() {
        super.setUp()
        // Code to set up before each test runs
    }

    override func tearDown() {
        // Code to clean up after each test runs
        super.tearDown()
    }

    func testExample() {
        // Example test case
        let expectedValue = 13
        let actualValue = computeAnswer()
        XCTAssertEqual(expectedValue, actualValue, "The computed answer should be 13")
    }

    func testPerformanceExample() {
        self.measure {
            // Code to measure the performance of
            performIntensiveTask()
        }
    }
}
XCTest Assertions
Assertions are at the core of XCTest, used to verify that the code behaves as expected. Some common assertions include:
- `XCTAssertEqual`: Verifies that two expressions are equal.
- `XCTAssertTrue`: Verifies that an expression is true.
- `XCTAssertFalse`: Verifies that an expression is false.
- `XCTAssertNil`: Verifies that an expression is nil.
- `XCTFail`: Unconditionally fails a test.
Running Tests in Xcode
Tests run directly within Xcode:
- Use the Test Navigator to run individual tests or groups of tests.
- Use the `Command+U` shortcut to run all tests in the current scheme.
- View test results and logs in the Xcode test report pane.
Advanced Features
XCTest offers several advanced features:
- Mocking and stubbing: XCTest can be combined with libraries that provide mock objects and stubs to simulate complex interactions and dependencies.
- Data-driven testing: XCTest can support parameterized tests to run the same test with different sets of data.
- Custom test targets: You can create separate test targets for unit tests and UI tests within your Xcode project.
Use Cases
XCTest is widely used in the following scenarios:
- Unit testing: Test individual components or functions of the app to ensure they work as intended.
- UI testing: Automate the testing of the app's user interface to ensure it behaves correctly under various conditions.
- Regression testing: Run a suite of tests to ensure that recent code changes have not broken existing functionality.
- Continuous integration: Integrate tests into the CI/CD pipeline to automatically run them during the build process.
Basic Structure of an XCTest
An XCTest UI test case typically looks like this:
swift
Copied!
func testExampleMainTab() throws {
        let app = XCUIApplication()
        app.launch()
        let Tab1 = app.tabBars["Tab Bar"].buttons["Backyards"]
        let Tab2 = app.tabBars["Tab Bar"].buttons["Birds"]
        let Tab3 = app.tabBars["Tab Bar"].buttons["Plants"]
        let Tab4 = app.tabBars["Tab Bar"].buttons["Account"]

        Tab1.tap() // Tap to first Tab
        let backyardsNavigationBar = XCUIApplication().navigationBars["Backyards"]
        // Validation layouts
        XCTAssertTrue(backyardsNavigationBar.staticTexts["Backyards"].waitForExistence(timeout: 10))
        XCTAssertTrue(backyardsNavigationBar.searchFields["Search"].exists)
        Tab2.tap() // Tap to second Tab
        let birdsNavigationBar = XCUIApplication().navigationBars["Birds"]
        // Validation layouts
        XCTAssertTrue(birdsNavigationBar.staticTexts["Birds"].waitForExistence(timeout: 10))
        XCTAssert(birdsNavigationBar.searchFields["Search"].exists)
        XCTAssertTrue(app.scrollViews.otherElements.images["Bird 4/Wing"].exists)
        // Validation layouts negativ
        XCTAssertFalse(backyardsNavigationBar.staticTexts["Backyards"].waitForExistence(timeout: 10))
        XCTAssertFalse(backyardsNavigationBar.searchFields["Search"].exists)
        Tab3.tap() // Tap on the third Tab
        let plantsNavigationBar = XCUIApplication().navigationBars["Plants"]
        // Validation layouts
        XCTAssertTrue(plantsNavigationBar.staticTexts["Plants"].waitForExistence(timeout: 10))
        XCTAssert(plantsNavigationBar.searchFields["Search"].exists)
        // Validation layouts negativ
        XCTAssertFalse(app.scrollViews.otherElements.images["Bird 4/Wing"].exists)
        XCTAssertFalse(backyardsNavigationBar.staticTexts["Backyards"].waitForExistence(timeout: 10))
        XCTAssertFalse(backyardsNavigationBar.searchFields["Search"].exists)
        Tab4.tap() // Tap on the fourth Tab
        // Tap to layout
        app.buttons["Get Backyard Birds Pass"].tap()
    }
}
Hopefully, everything described above gives you a sense of just how much power and flexibility is available to you using the tools that come with Xcode. XCTest is a powerful framework for iOS and macOS developers to ensure their applications are reliable, performant, and bug-free.
about the author
Štefan Varšo

I'm a QA engineer with more than 10 years of experience. My working life is filled with many interesting projects, including audio/video QA, the medical field, and even mobile marketing applications. It was right here that I discovered the charm of testing with native mobile frameworks like Xcode. Leading the QA stream at Hotovo gives me great pleasure and satisfaction in the work I have done. I love to travel and have circled the globe — east to west. “Surprisingly”— yes! The Earth is not flat! I also enjoy testing good wine or craft beer, and when it’s too much, you can find me relaxing on a mountain peak or in freezing cold water.